NKP Prerequisites

Hello friends, welcome back!
Today's topic is all about pre-requisites. Prerequisites are super important and they form a solid base foundation of getting Nutanix Kubernetes Platform installed in a single shot. It also provides helpful day 2 tools that i feel are important especially when doing troubleshooting and security.
Lets dive in!
TL;DR
- NKP installation succeeds only when all prerequisites are in place—treat this as a checklist before you run the installer.
- Spin up a small jumphost/bastion (Ubuntu, Rocky, RHEL, etc.) and install the key tooling:
kubectl,yq,helm,k9s,docker,kubeseal, plus optionalcilium,flux, andistioCLIs with 2vCPUs and 8GB of RAM. - Create and verify DNS records for the NKP cluster FQDN, Prism Central (PC), internal container registry, Nutanix Files & Objects endpoints.
- Issue valid TLS certificates for the NKP FQDN, PC, registry (and any other endpoints) with correct SANs.
- Mirror the NKP air-gapped bundle (~15 GB) to an internal registry to avoid Docker Hub rate limits and ensure a consistently quick installation experience.
- Plan networking early: choose pod & service CIDRs that do NOT overlap with existing LANs; ensure DHCP/IPAM hands out IP + DNS, or bake DNS into pre-provisioned hosts. Ensure IP Addresses are allocated for the Kubernetes API Server and LoadBalancer Service Range and they are excluded from the DHCP Range.
- Prepare service accounts for LDAP, Prism Central, Files, and Objects with the roles/permissions listed in Nutanix docs.
- Decide on centralised authentication (LDAP, OIDC, SAML) and collect the required bind credentials / IdP info.
- Check compatibility: NKP 2.15 requires Prism Central 2024.1+ and AOS 6.5/6.8+.
- Use only supported OS versions (Ubuntu 22.04, Rocky 9.x, RHEL 8.10, etc.). Disable swap, enable
iscsid, trust internal CAs, size/var/lib/containerdgenerously, and include cloud-init for custom images. - Size the cluster: Control Plane nodes 3 × (4 vCPU, 16 GiB RAM, 100 GiB disk); Worker nodes ≥ 4x (4 vCPU, 16 GiB RAM, 100 GiB disk)
With these pieces in place you’ll eliminate 90 % of install failures and be ready for a smooth NKP deployment.
The Why
Prerequisites as mentioned in the header of this blog is super important and forms the solid foundation of Nutanix Kubernetes Platform (NKP) and subsequent actions you perform on it.
I know it's a boring topic but it's super important as i've had many colleagues, friends, customers, partners reaching out to figure out why their NKP installation is failing. Many times it's due to Docker Rate Limits or misconfigurations or subnet overlaps. The list of reasons goes on.
Hence I thought that it would be important to run through what I think are the most important prerequisites so that our adventure into NKP is as smooth as possible.
List of Prerequisites (Simplified List)
Here's a list to ensure that you have everything you need:
- Jumphost/Bastion
- NTP
- DNS & DNS Server
- Certificates
- Registry
- Networking Configuration (Ensuring CIDRs dont overlap / DHCP..)
- Service Accounts (For LDAP / Nutanix)
- LDAP/OIDC
- NCI and PC Cluster Versions (If Deploying on Nutanix)
- Pre-provisioned OS (If Deploying on Bare Metal / Self-Provisioned VMs / CloudVMs)
- Custom BaseOS Images (If using your own images.)
- Resource Configurations for Control Plane and Worker Nodes
- Airgapped Bundle & NKP CLI (Mandatory!)
Lets break it down into their individual sections.
Jumphost/Bastion
What do we use a Jumphost/Bastion for? Well we basically execute all the commands to install NKP, and any additional commands to do configuration changes etc. I typically like to have a dedicated Jumphost/Bastion to access my clusters instead of accessing those directly from my Mac.
Provision a small VM (Ubuntu 22.04 / Ubuntu 24.04 LTS / Rocky / RHEL) with the following tools installed. Below this section i provide a automated script for both Debian and Fedora. In my previous video i used Rocky Linux instead. Either distribution doesnt matter and it's all person preference. But since Nutanix now has a partnership with Canonical, i personally felt it was a good time to get familiar with Ubuntu.
Use the following resource assignments: 2vCPUs, 8GB RAM
kubectl- To interact with Kuberentesyq- Great for yaml, json, etc parsinghelm- Package Manager for Kubernetesk9s- Terminal UI for Kubernetes (I really love k9s, makes troubleshooting so much easier)docker- Used to spin up the KinD (Kubernetes in Docker) Cluster for Bootstrap, and konvoy image builder to provision custom images. I prefer Docker over Podman as I've encountered126errors in Podman before and still havent figured a way out. You can use Podman but YMMVkubeseal- Must have. Allows us to create sealed secrets within Kubernetescilium- Good to have, especially when we're doing more advanced Cilium Configurationsflux- Good to have, especially when we're delving deeper into GitOpsistio- Good to have, especially when we're delving deeper into Istio Service Meshstep-cli- Good to have, especially if you're generating your own certificatesnkpCLI - CLI tool used to install and manage NKP
Note the script uses sudo, so prepare your sudo password to perform the installation.
For my airgapped friends.. sorry! You'll need to manually download the individual RPMs/DEBs and bring it into your jumphost.
- Debian (Ubuntu)
- Fedora (RHEL/Rocky)
# Ensure /usr/local/bin is in PATH
export PATH="/usr/local/bin:$PATH"
echo 'export PATH="/usr/local/bin:$PATH"' >> ~/.bashrc
echo 'export PATH="/usr/local/bin:$PATH"' | sudo tee -a /root/.bashrc > /dev/null

#Install Bash Completion, git, curl, wget, jq and other dependencies if not already installed
sudo apt update
sudo apt install -y bash-completion curl wget git gnupg lsb-release ca-certificates jq

# Install kubectl & configure kubectl bash completion
curl -LO "https://dl.k8s.io/release/$(curl -L -s https://dl.k8s.io/release/stable.txt)/bin/linux/amd64/kubectl"
sudo install -o root -g root -m 0755 kubectl /usr/local/bin/kubectl
rm -f kubectl
source <(kubectl completion bash)
echo "source <(kubectl completion bash)" >> ~/.bashrc
echo "alias k=kubectl" >> ~/.bashrc
echo "complete -o default -F __start_kubectl k" >> ~/.bashrc
# Also add kubectl completion to root's bashrc
echo "source <(kubectl completion bash)" | sudo tee -a /root/.bashrc > /dev/null
echo "alias k=kubectl" | sudo tee -a /root/.bashrc > /dev/null
echo "complete -o default -F __start_kubectl k" | sudo tee -a /root/.bashrc > /dev/null

# Install yq
sudo wget https://github.com/mikefarah/yq/releases/latest/download/yq_linux_amd64 -O /usr/local/bin/yq &&\
sudo chmod 755 /usr/local/bin/yq

# Install helm & configure helm bash completion
curl https://raw.githubusercontent.com/helm/helm/main/scripts/get-helm-3 | sudo bash
sudo chmod 755 /usr/local/bin/helm
source <(helm completion bash)
echo "source <(helm completion bash)" >> ~/.bashrc
echo "source <(helm completion bash)" | sudo tee -a /root/.bashrc > /dev/null

# Install K9s
wget https://github.com/derailed/k9s/releases/latest/download/k9s_Linux_amd64.tar.gz
tar zxvf k9s_Linux_amd64.tar.gz
sudo mv k9s /usr/local/bin
sudo chmod 755 /usr/local/bin/k9s
rm -f k9s_Linux_amd64.tar.gz LICENSE README.md
source <(k9s completion bash)
echo "source <(k9s completion bash)" >> ~/.bashrc
echo "source <(k9s completion bash)" | sudo tee -a /root/.bashrc > /dev/null

# Install Docker
## Remove podman if installed (not common on Ubuntu, but just in case)
for pkg in docker.io docker-doc docker-compose docker-compose-v2 podman-docker containerd runc; do sudo apt-get remove $pkg; done

## Add Docker’s official GPG key and repo
sudo install -m 0755 -d /etc/apt/keyrings
curl -fsSL https://download.docker.com/linux/ubuntu/gpg | sudo gpg --batch --yes --dearmor -o /etc/apt/keyrings/docker.gpg
echo \
  "deb [arch=$(dpkg --print-architecture) signed-by=/etc/apt/keyrings/docker.gpg] \
  https://download.docker.com/linux/ubuntu \
  $(lsb_release -cs) stable" | \
  sudo tee /etc/apt/sources.list.d/docker.list > /dev/null

sudo apt update
sudo apt install -y docker-ce docker-ce-cli containerd.io docker-buildx-plugin docker-compose-plugin
sudo systemctl enable --now docker

# Install kubeseal for SealedSecrets
KUBESEAL_VERSION=$(curl -s https://api.github.com/repos/bitnami-labs/sealed-secrets/tags | jq -r '.[0].name' | cut -c 2-)
if [ -z "$KUBESEAL_VERSION" ]; then
    echo "Failed to fetch the latest KUBESEAL_VERSION"
    exit 1
fi
curl -OL "https://github.com/bitnami-labs/sealed-secrets/releases/download/v${KUBESEAL_VERSION}/kubeseal-${KUBESEAL_VERSION}-linux-amd64.tar.gz"
tar -xvzf kubeseal-${KUBESEAL_VERSION}-linux-amd64.tar.gz kubeseal
sudo install -m 755 kubeseal /usr/local/bin/kubeseal
rm -f kubeseal kubeseal-${KUBESEAL_VERSION}-linux-amd64.tar.gz

# Install Cilium CLI
CILIUM_CLI_VERSION=$(curl -s https://raw.githubusercontent.com/cilium/cilium-cli/main/stable.txt)
CLI_ARCH=amd64
if [ "$(uname -m)" = "aarch64" ]; then CLI_ARCH=arm64; fi
curl -L --fail --remote-name-all https://github.com/cilium/cilium-cli/releases/download/${CILIUM_CLI_VERSION}/cilium-linux-${CLI_ARCH}.tar.gz{,.sha256sum}
sha256sum --check cilium-linux-${CLI_ARCH}.tar.gz.sha256sum
sudo tar xzvfC cilium-linux-${CLI_ARCH}.tar.gz /usr/local/bin
sudo chmod 755 /usr/local/bin/cilium
rm -f cilium-linux-${CLI_ARCH}.tar.gz{,.sha256sum}
echo "source <(cilium completion bash)" >> ~/.bashrc
echo "source <(cilium completion bash)" | sudo tee -a /root/.bashrc > /dev/null

# Install Flux CLI
curl -s https://fluxcd.io/install.sh | sudo bash
sudo chmod 755 /usr/local/bin/flux
echo "source <(flux completion bash)" >> ~/.bashrc
echo "source <(flux completion bash)" | sudo tee -a /root/.bashrc > /dev/null

# Install Istio CLI
curl -sL https://istio.io/downloadIstioctl | sh -
sudo mv $HOME/.istioctl/bin/istioctl /usr/local/bin
sudo chmod 755 /usr/local/bin/istioctl
rm -rf $HOME/.istioctl
echo "source <(istioctl completion bash)" >> ~/.bashrc
echo "source <(istioctl completion bash)" | sudo tee -a /root/.bashrc > /dev/null

# Install Step CLI
sudo apt-get update && sudo apt-get install -y --no-install-recommends curl vim gpg ca-certificates
curl -fsSL https://packages.smallstep.com/keys/apt/repo-signing-key.gpg | sudo tee /etc/apt/trusted.gpg.d/smallstep.asc > /dev/null && \
    echo 'deb [signed-by=/etc/apt/trusted.gpg.d/smallstep.asc] https://packages.smallstep.com/stable/debian debs main' \
    | sudo tee /etc/apt/sources.list.d/smallstep.list > /dev/null
sudo apt-get update && sudo apt-get -y install step-cli
sudo chmod 755 /usr/bin/step
source <(step completion bash)
echo "source <(step completion bash)" >> ~/.bashrc
echo "source <(step completion bash)" | sudo tee -a /root/.bashrc > /dev/null

# Install Velero CLI
curl -LO https://github.com/vmware-tanzu/velero/releases/download/v1.17.1/velero-v1.17.1-linux-amd64.tar.gz
tar -xzf velero-v1.17.1-linux-amd64.tar.gz
sudo mv velero-v1.17.1-linux-amd64/velero /usr/local/bin/velero
sudo rm -rf velero*
echo "source <(velero completion bash)" >> ~/.bashrc
echo "source <(velero completion bash)" | sudo tee -a /root/.bashrc > /dev/null


sudo groupadd docker
# Adds ubuntu user into docker group
sudo usermod -aG docker ubuntu
# Refreshes group memberships
newgrp docker
# Ensure /usr/local/bin is in PATH
export PATH="/usr/local/bin:$PATH"
echo 'export PATH="/usr/local/bin:$PATH"' >> ~/.bashrc
echo 'export PATH="/usr/local/bin:$PATH"' | sudo tee -a /root/.bashrc > /dev/null

#Install Bash Completion, git, curl, wget, jq and other dependencies if not already installed
sudo dnf install -y bash-completion git curl wget jq

#Install kubectl & configure kubectl bash completion
curl -LO "https://dl.k8s.io/release/$(curl -L -s https://dl.k8s.io/release/stable.txt)/bin/linux/amd64/kubectl"
sudo install -o root -g root -m 0755 kubectl /usr/local/bin/kubectl
rm -f kubectl
source <(kubectl completion bash) # set up autocomplete in bash into the current shell, bash-completion package should be installed first.
echo "source <(kubectl completion bash)" >> ~/.bashrc # add autocomplete permanently to your bash shell.
echo "alias k=kubectl" >> ~/.bashrc
echo "complete -o default -F __start_kubectl k" >> ~/.bashrc
# Also add kubectl completion to root's bashrc
echo "source <(kubectl completion bash)" | sudo tee -a /root/.bashrc > /dev/null
echo "alias k=kubectl" | sudo tee -a /root/.bashrc > /dev/null
echo "complete -o default -F __start_kubectl k" | sudo tee -a /root/.bashrc > /dev/null

# Install yq
sudo wget https://github.com/mikefarah/yq/releases/latest/download/yq_linux_amd64 -O /usr/local/bin/yq &&\
sudo chmod 755 /usr/local/bin/yq

#Install helm & configure helm bash completion
curl https://raw.githubusercontent.com/helm/helm/main/scripts/get-helm-3 | sudo bash
sudo chmod 755 /usr/local/bin/helm
source <(helm completion bash) # set up autocomplete in bash into the current shell, bash-completion package should be installed first.
echo "source <(helm completion bash)" >> ~/.bashrc # add autocomplete permanently to your bash shell.
echo "source <(helm completion bash)" | sudo tee -a /root/.bashrc > /dev/null

#Install K9s
wget https://github.com/derailed/k9s/releases/latest/download/k9s_Linux_amd64.tar.gz
tar zxvf k9s_Linux_amd64.tar.gz
sudo mv k9s /usr/local/bin
sudo chmod 755 /usr/local/bin/k9s
rm -f k9s_Linux_amd64.tar.gz LICENSE README.md
source <(k9s completion bash) # set up autocomplete in bash into the current shell, bash-completion package should be installed first.
echo "source <(k9s completion bash)" >> ~/.bashrc # add autocomplete permanently to your bash shell.
echo "source <(k9s completion bash)" | sudo tee -a /root/.bashrc > /dev/null

#Install Docker
## First clean up default Podman Installations
sudo dnf remove -y podman buildah runc containers-common

sudo dnf config-manager --add-repo https://download.docker.com/linux/rhel/docker-ce.repo
sudo dnf -y install docker-ce docker-ce-cli containerd.io docker-buildx-plugin docker-compose-plugin
sudo systemctl --now enable docker

#Install kubeseal for SealedSecrets
KUBESEAL_VERSION=$(curl -s https://api.github.com/repos/bitnami-labs/sealed-secrets/tags | jq -r '.[0].name' | cut -c 2-)

# Check if the version was fetched successfully
if [ -z "$KUBESEAL_VERSION" ]; then
    echo "Failed to fetch the latest KUBESEAL_VERSION"
    exit 1
fi

curl -OL "https://github.com/bitnami-labs/sealed-secrets/releases/download/v${KUBESEAL_VERSION}/kubeseal-${KUBESEAL_VERSION}-linux-amd64.tar.gz"
tar -xvzf kubeseal-${KUBESEAL_VERSION}-linux-amd64.tar.gz kubeseal
sudo install -m 755 kubeseal /usr/local/bin/kubeseal
rm -f kubeseal kubeseal-${KUBESEAL_VERSION}-linux-amd64.tar.gz kubeseal

#Install Cilium CLI
CILIUM_CLI_VERSION=$(curl -s https://raw.githubusercontent.com/cilium/cilium-cli/main/stable.txt)
CLI_ARCH=amd64
if [ "$(uname -m)" = "aarch64" ]; then CLI_ARCH=arm64; fi
curl -L --fail --remote-name-all https://github.com/cilium/cilium-cli/releases/download/${CILIUM_CLI_VERSION}/cilium-linux-${CLI_ARCH}.tar.gz{,.sha256sum}
sha256sum --check cilium-linux-${CLI_ARCH}.tar.gz.sha256sum
sudo tar xzvfC cilium-linux-${CLI_ARCH}.tar.gz /usr/local/bin
sudo chmod 755 /usr/local/bin/cilium
rm -f cilium-linux-${CLI_ARCH}.tar.gz{,.sha256sum}
echo "source <(cilium completion bash)" >> ~/.bashrc
echo "source <(cilium completion bash)" | sudo tee -a /root/.bashrc > /dev/null

#Install Flux CLI
curl -s https://fluxcd.io/install.sh | sudo bash
sudo chmod 755 /usr/local/bin/flux
echo "source <(flux completion bash)" >> ~/.bashrc
echo "source <(flux completion bash)" | sudo tee -a /root/.bashrc > /dev/null

#Install Istio CLI
curl -sL https://istio.io/downloadIstioctl | sh -
sudo mv $HOME/.istioctl/bin/istioctl /usr/local/bin
sudo chmod 755 /usr/local/bin/istioctl
rm -rf $HOME/.istioctl
echo "source <(istioctl completion bash)" >> ~/.bashrc
echo "source <(istioctl completion bash)" | sudo tee -a /root/.bashrc > /dev/null

# Install Step CLI
sudo cat <<EOT | sudo tee /etc/yum.repos.d/smallstep.repo > /dev/null
[smallstep]
name=Smallstep
baseurl=https://packages.smallstep.com/stable/fedora/
enabled=1
repo_gpgcheck=0
gpgcheck=1
gpgkey=https://packages.smallstep.com/keys/smallstep-0x889B19391F774443.gpg
EOT
sudo dnf makecache && sudo dnf install -y step-cli step-ca
sudo chmod 755 /usr/bin/step
source <(step completion bash)
echo "source <(step completion bash)" >> ~/.bashrc
echo "source <(step completion bash)" | sudo tee -a /root/.bashrc > /dev/null
NTP (Network Time Protocol)
Everything in Kubernetes works with TLS Certificates. Certificates are time sensitive. Key and token exchange between OIDC / SAML / LDAP are also time sensitive.
There are also other components in the entire infrastructure stack that are time sensitive (Nutanix AOS for example). Hence it makes total sense to ensure that NTP is properly configured in all aspects of infrastructure.
-
Hypervisor has NTP configured (AHV / vSphere / etc) - When VMs get spun up, they get their time from the underlying hypervisor
-
VMs - Ensure VMs has NTP configured. This includes the Jumphost, Registry, and Custom BaseOS images you're using for NKP deployments
DNS & DNS Server
Everything in Kubernetes revolves around DNS. That should not be an exception for infrastructure supporting Kubernetes as well.
Having proper DNS entries ensures that you do not need to hardcode IP addresses as well as providing the capability to use certificates.
Here are some of the basic DNS entries that we definitely need to provision for.
1. NKP Cluster FQDN
When we try to access our NKP cluster after post deployment, we wouldn't want to be accessing it via the IP address.
- It isn't as secure as it's using the default self-signed certificates.
- Better user experience. It's easier to remember
nkp-mgmt-cluster.wskn.localvs172.26.193.21😀
When we configure the FQDN DNS, the IP for the FQDN should be the first IP Address of your Load Balancer IP.
e.g. if your NKP Service LoadBalancer range is 10.168.100.20-10.168.100.25, the DNS Entry IP Address should be 10.168.100.20.
2. Prism Central FQDN (If deploying on Nutanix)
When deploying on Nutanix, Prism Central (PC) is the single-pane management interface that NKP leverages heavily. Make sure a friendly FQDN (for example pc.wskn.local) resolves to the PC VIP so that certificates and integrations all work painlessly.
3. Registry
When we deploy NKP, we're going to be using a "Airgapped First" installation method. What this means is regardless if your cluster has an internet connection, we'll still be using an internal registry to host and pull our NKP container images. This is to avoid rate limits from DockerHub. Leads to a more consistent and faster installation experience.
4. Nutanix Files
If we're planning to use Nutanix CSI with Nutanix Files for RWX persistent volumes, ensure that we have the DNS entries for Nutanix Files provisioned.
5. Nutanix Objects
If we're intending to use Nutanix Objects via COSI, it's important to ensure that the DNS entries for Nutanix Objects are created as well.
Certificates
Certificates go hand-in-hand with DNS. At minimum you will want:
- A certificate for the NKP cluster (e.g.
nkp-mgmt-cluster.wskn.local). Or wildcard is fine as well. - A certificate for Prism Central (e.g.
pc.wskn.local). - A certificate for your internal registry (e.g.
registry.wskn.local).
Enusure that all certificates has their SAN DNS names included
Additional certs that you should definitely consider are also for Nutanix Objects, Active Directory / LDAP / OIDC
You can generate them with an internal PKI such as Microsoft AD CS, HashiCorp Vault, Step CA (to name a few) or use a public CA like Let's Encrypt if the names are publicly resolvable.
In my example, i'm using step-cli to quickly create a chain of certs. But for production, definitely use an Enterprise Grade CA. The concepts are the same.
Here's how i use stepcli to generate the certificate chain.
# Root CA - THIS IS OBVIOUSLY NOT A BEST PRACTICE. FOLLOW YOUR ORGANIZATION'S PRACTICES!
step certificate create wskn-root-ca wskn-root-ca.crt wskn-root-ca.key --profile root-ca --not-after=87660h --no-password --insecure --kty RSA

# Intermediate CA - THIS IS OBVIOUSLY NOT A BEST PRACTICE. FOLLOW YOUR ORGANIZATION'S PRACTICES!
step certificate create wskn-intermediate-ca wskn-intermediate-ca.crt wskn-intermediate-ca.key --ca wskn-root-ca.crt --ca-key wskn-root-ca.key --profile intermediate-ca --not-after=87660h --no-password --insecure --kty RSA

# Server Certs - THIS IS OBVIOUSLY NOT A BEST PRACTICE. FOLLOW YOUR ORGANIZATION'S PRACTICES!
step certificate create wskn.local server.crt server.key --ca ./wskn-intermediate-ca.crt --ca-key ./wskn-intermediate-ca.key --no-password --insecure --san=wskn.local --san=*.wskn.local --san=*.*.wskn.local --not-after=87661h --kty RSA

# Concat ICA + RCA into a single CA Chain File. DO NOTE THE ORDER MATTERS!! ICA FIRST THEN RCA!
cat wskn-intermediate-ca.crt >> wskn-ca-chain.crt
cat wskn-root-ca.crt >> wskn-ca-chain.crt
Internal Registry
Docker Hub rate limits will break the installation faster than you can say “429”.
Mirror the NKP images into an internal registry that is reachable from every node.
Ensure that the registry has sufficient storage space to store minimally the Nutanix Kubernetes Platform Airgapped bundle, which is about 15GB. Provision for at least 20GB.
Here are the steps that we can use to setup our own registry. Note this registry will only be used to host the container images used by NKP. Not you, your organization nor your customer's container images.
The Internal Registry that we will be using will be Harbor
We do need to ensure that we have Docker and Docker Compose installed in the VM we're using for this registry. I wont cover the installation of Docker here as it's already available above in the Jumphost section.
We are also going to be using the certificate we created earlier in the Certificates section.
The installation steps below works for airgapped environments as well. just make sure you download the latest offline harbor release from the Harbor Github
# Elevate permissions for installation
sudo -i

mkdir -p /harbor && cd /harbor

## ENSURE YOU CHANGE THE FQDN BELOW TO SUIT YOUR ENVIRONMENT!

export DOMAIN_NAME=wskn.local
export REGISTRY_FQDN=registry.wskn.local
export CA_CERT_PATH=/home/winson/certs/server.crt
export CA_KEY_PATH=/home/winson/certs/server.key
export CA_CHAIN_PATH=/home/winson/certs/wskn-ca-chain.crt

# Download Harbor Binaries
curl -s https://api.github.com/repos/goharbor/harbor/releases/latest | grep browser_download_url | cut -d '"' -f 4 | grep '\.tgz$' | wget -i -

tar xvzf harbor-offline-installer*.tgz

cd harbor

docker load -i harbor.*.tar.gz

cp harbor.yml.tmpl harbor.yml

mkdir -p /etc/docker/certs.d/${DOMAIN_NAME}

cp ${CA_CHAIN_PATH} /etc/docker/certs.d/${DOMAIN_NAME}

# Install CA certificates based on OS
if [ -f /etc/redhat-release ] || [ -f /etc/fedora-release ] || [ -f /etc/rocky-release ] || [ -f /etc/almalinux-release ]; then
    # RHEL/CentOS/Fedora/Rocky/AlmaLinux
    cp ${CA_CHAIN_PATH} /etc/pki/ca-trust/source/anchors/
    update-ca-trust
elif [ -f /etc/debian_version ] || [ -f /etc/lsb-release ]; then
    # Debian/Ubuntu and derivatives
    cp ${CA_CHAIN_PATH} /usr/local/share/ca-certificates/
    update-ca-certificates
else
    echo "Warning: Unknown OS. Please manually install CA certificates."
fi

systemctl restart docker

sed -i \
-e 's/hostname: reg.mydomain.com/hostname: '${REGISTRY_FQDN}'/' \
-e 's|certificate: /your/certificate/path|certificate: '${CA_CERT_PATH}'|' \
-e 's|private_key: /your/private/key/path|private_key: '${CA_KEY_PATH}'|' \
harbor.yml

./prepare
./install.sh
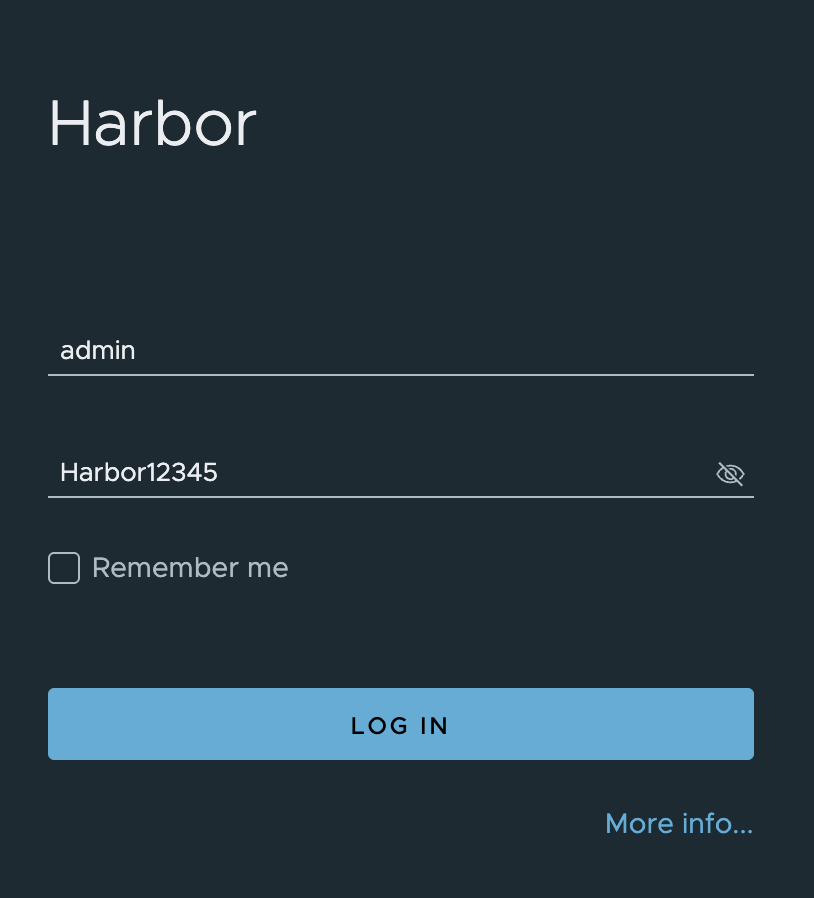
We can then login into Harbor and Create a new Project
Default Username: admin
Default Password: Harbor12345
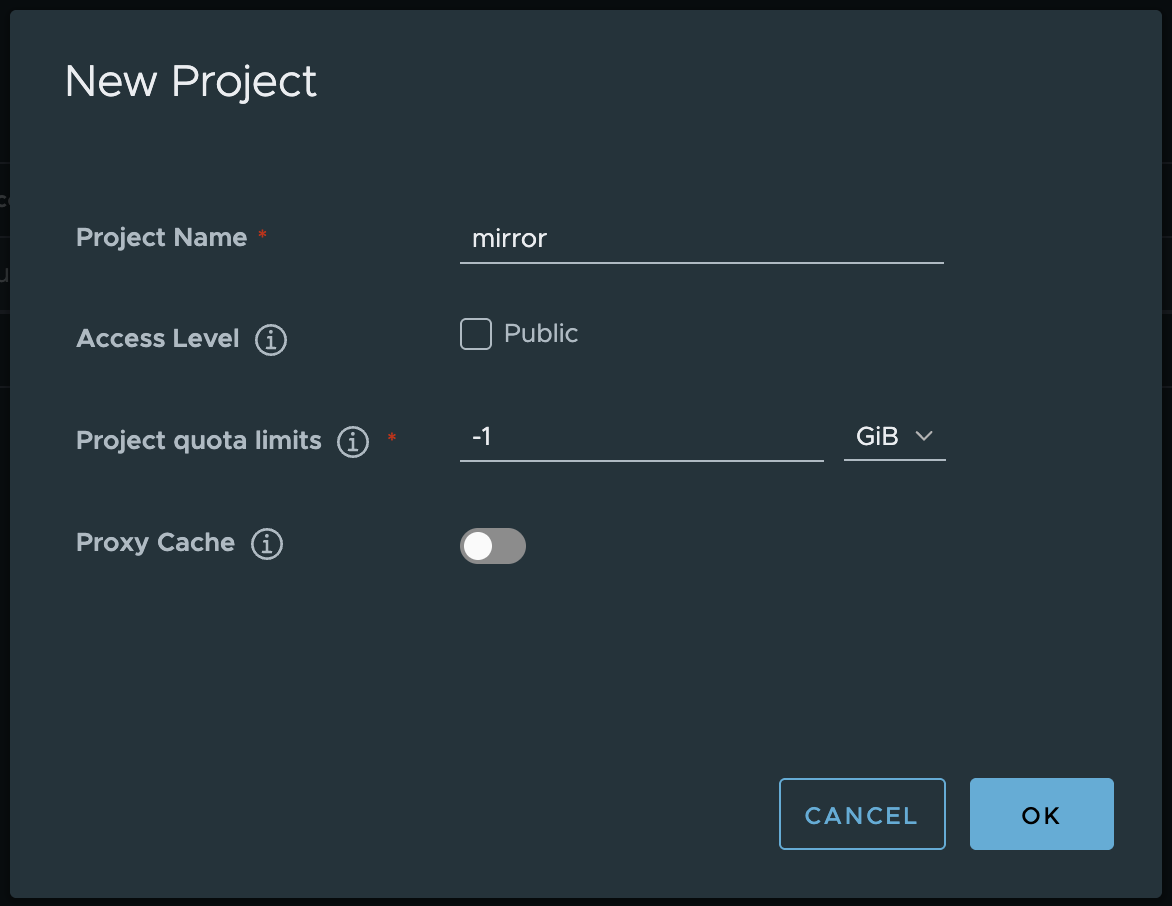
Click New Project

Give it a purposeful name. I use mirror all the time.
Networking Configuration
Failure here is the #1 reason for aborted / failed installs.
- Choose non-overlapping CIDRs:
e.g. If your local LAN subnets use 192.168.3.0/24, it is going to overlap with the default Pod Range. Make sure you change the default Pod Range.
Below are the default Pod and Service CIDRs. Once again, ensure they do not overlap with what you have in your LAN. If they do, make sure to change those during the deployment stage.
- Pod CIDR:
192.168.0.0/16 - Service CIDR:
10.96.0.0/12
-
Plan network segments early. We need to assign IP Addresses to the Kubernetes API Server and the LoadBalancer Range. I typically have that mapped out in a spreadsheet.
-
DHCP/IPAM
If we're doing automated installs on Nutanix or vSphere (or AWS/Azure), be sure to have the Networks configured with DHCP (or IPAM in AHV). VMs that gets spun up during the automated deployment process needs to automatically get IP Addresses. Also ensure that the DHCP (or IPAM in AHV) excludes the range specified for the Kubernetes API Server and LoadBalancer Service Range.
If we cant use DHCP or IPAM, we can still install NKP. But we'll need to rely on prepvosioned infrastructure which will also be covered in later sections.
- DNS in DHCP/IPAM Configuration
Ensure that DNS servers are configured when your DHCP or IPAM hands out IP Addresses. If we dont use DHCP / IPAM, make sure DNS is configured in the preprovisioned VMs or Bare Metal servers.
Service Accounts
Ensure we have service accounts created for the following at minimum:
-
LDAP (If using LDAP / Active Directory) - NKP Service Account for LDAP authentication
-
Prism Central - Ensure Prism Central is linked to LDAP / SAML and have a dedicated service account with dedicated roles for NKP. View here for the official Infrastructure PC Role Requirements and View here for the official Storage PC Role Requirements
-
Nutanix Files (If using Nutanix Files for RWX PVCs) - Ensure that a REST API Access User is created in Nutanix Files. View here for the official Documentation on Creating the REST API Access User in Nutanix Files
-
Nutanix Objects (If using COSI) - Create a user (Ideally from LDAP) Access Keys. View here for the official Documentation on Creating Access Keys for User in Nutanix Objects
I wont be covering vSphere or other cloud providers here. Esp. vSphere since i'm super rusty with regards to vSphere. But if i do touch it someday, i'll definitely add it in.
LDAP / OIDC
Centralised auth is a must for production clusters. Choose between 1 or a combination of a few providers.
-
LDAP: Prepare service account DN & bind password, Base DN, search filter.
-
OIDC: Ensure you have an identity provider capable of OIDC.
-
SAML: Ensure you have an identity provider capable of SAML.
NCI and PC Cluster Versions (If Deploying on Nutanix)
Ensure that the version of NKP you're deploying supports the version of Prism Central and Nutanix AOS you're currently running. As of this time of this blog it's as per below:
NKP Version 2.15.0: Prism Central 2024.1 and above AOS 6.5, 6.8 and above
You can find the latest here
Preprovisioned OS (Bare Metal or Manually provisioned VMs)
Ensure that the OS that has been installed meets the supported OS requirements of NKP. As of NKP 2.15.0, we support the below:
- Ubuntu 22.04
- Rocky 9.1
- RHEL 8.10
- Flatcar 3033.3.18
- Oracle linux RH 8.9
Find the latest supported OS here
Above and beyond all the additional hardening (FIPS, CIS L2, etc) that is done on the Preprovisioned VM or Bare Metal Server, ensure the below:
- Ensure iscsid is enabled (especially if we're going to be using RWO Network Based Storage (iSCSI))
- Make sure swap is disabled (Kubernetes doesnt support swap being enabled)
- Make sure any trusted certificates are baked into the OS (Allows the OS to automatically trust certificates generated internally within the Organization)
- Ensure /var is sufficiently sized (Container images which are pulled are stored in /var/lib/containerd. If we foresee massive container images, make sure we have ample space in /var/lib/containerd)
Not to worry, we'll have a dedicated section on Preprovisioned.
Custom BaseOS (Automated Deployments with a Custom Image)
If we do not intend to use the Nutanix Provided Rocky Linux or Rocky Linux CIS images (and in the future Ubuntu Pro 😀), we can choose to build our own images as well.
Ensure that the Custom BaseOS that is going to be used meets the supported OS requirements of NKP. As of NKP 2.15.0, we support the below for installation onto Nutanix:
- Ubuntu 22.04
- Rocky 9.5
- RHEL 8.10
Above and beyond all the additional hardening (FIPS, CIS L2, etc) that is done on the Preprovisioned VM or Bare Metal Server, ensure the below:
- Ensure iscsid is enabled (especially if we're going to be using RWO Network Based Storage (iSCSI))
- Make sure swap is disabled (Kubernetes doesnt support swap being enabled)
- Make sure any trusted certificates are baked into the OS (Allows the OS to automatically trust certificates generated internally within the Organization)
- Ensure /var is sufficiently sized (Container images which are pulled are stored in /var/lib/containerd. If we foresee massive container images, make sure we have ample space in /var/lib/containerd)
- Ensure Cloud-Init is installed (NKP uses Cloud-Init to prepare the image to become ClusterAPI compatible)
Not to worry, we'll have a dedicated section on creating your own Custom Base Images.
Resource Configurations for Control Plane and Worker Nodes
Control Plane (per node, 3 node minimum):
- 4 vCPU, 16 GiB RAM, 100 GiB disk (Ensure Disk sizes are appropriate for /var/lib/containerd)
Worker (per node, 4 nodes minimum):
- 8 vCPU, 32 GiB RAM, 100 GiB disk (Ensure Disk sizes are appropriate for /var/lib/containerd)
Air-gapped Bundle & NKP CLI (Mandatory!)
We definitely want to download the Nutanix Kubernetes Platform Airgapped bundle. We'll use this bundle to push all the container images used in Nutanix Kubernetes Platform into our Registry, so when deploying NKP, we are not encumbered by rate limits and network bottlenecks.
Once we download the Airgapped bundle, we'll push it to the Internal Registry we created above in the Internal Registry Section.
While it's a rather chunky bundle, ~15GB large, trust me the experience after that is way better.
We'll be downloading the Airgapped bundle directly into the Jumphost. We can download it from the Nutanix Portal.

Below is a script that i always use to Download and push the latest airgapped bundles.
## Ensure that you change the below to your environment.
export NKP_VERSION=v2.15.0
export REGISTRY_URL=registry.wskn.local/mirror
export REGISTRY_USERNAME=admin
export REGISTRY_PASSWORD=Harbor12345 #This is the default harbor password. Change to your environment
export REGISTRY_CACERT=/home/winson/certs/wskn-ca-chain.crt #ICA + RCA Chain

## Replace the DOWNLOAD_LINK_URL_YOU_COPIED_FROM_THE_ABOVE_STEP with the link you got above from the Nutanix Portal
curl -Lo "nkp-air-gapped-bundle_${NKP_VERSION}_linux_amd64.tar.gz" \
    "DOWNLOAD_LINK_URL_YOU_COPIED_FROM_THE_ABOVE_STEP"

## Ensure that you change <VERSION> to your actual NKP version
tar zxvf nkp-air-gapped-bundle_${NKP_VERSION}_linux_amd64.tar.gz

## Ensure that you change <VERSION> to your actual NKP version
cd nkp-${NKP_VERSION}

## Install NKP CLI
sudo cp ./cli/nkp /usr/bin/nkp
sudo chmod 755 /usr/bin/nkp
source <(nkp completion bash)
echo "source <(nkp completion bash)" >> ~/.bashrc
echo "source <(nkp completion bash)" | sudo tee -a /root/.bashrc > /dev/null

## Load NKP Bootstrap and Image Builder Images
sudo docker load -i nkp-image-builder-image-${NKP_VERSION}.tar
sudo docker load -i konvoy-bootstrap-image-${NKP_VERSION}.tar

## Push NKP images into registry
nkp push bundle --bundle ./container-images/konvoy-image-bundle-${NKP_VERSION}.tar \
  --to-registry=${REGISTRY_URL} \
  --to-registry-username=${REGISTRY_USERNAME} \
  --to-registry-password=${REGISTRY_PASSWORD} \
  --to-registry-ca-cert-file=${REGISTRY_CACERT}

nkp push bundle --bundle ./container-images/kommander-image-bundle-${NKP_VERSION}.tar \
  --to-registry=${REGISTRY_URL} \
  --to-registry-username=${REGISTRY_USERNAME} \
  --to-registry-password=${REGISTRY_PASSWORD} \
  --to-registry-ca-cert-file=${REGISTRY_CACERT}
Thats it! By dilligently following all the steps above, we'll eliminate almost 90% of all the potential issues when doing installations and help us with a single shot installation.
Thanks for reading and i'll see you on the next one!